

Easily create a stunning slideshow that you can share on Facebook in minutes
Slideshows and videos are more engaging, more memorable, and more popular than any other type of content on Facebook. The reason is simple: People prefer to see the faces they care about than read about them. So if you’ve got photos gathering digital dust in your phone or computer, take a few minutes to create a beautiful slideshow you can post on Facebook—and let everyone enjoy them.
How to create your slideshow for Facebook
1. Visit Smilebox Slideshow Maker
Click Create a Slideshow, and log in (or sign up for free).

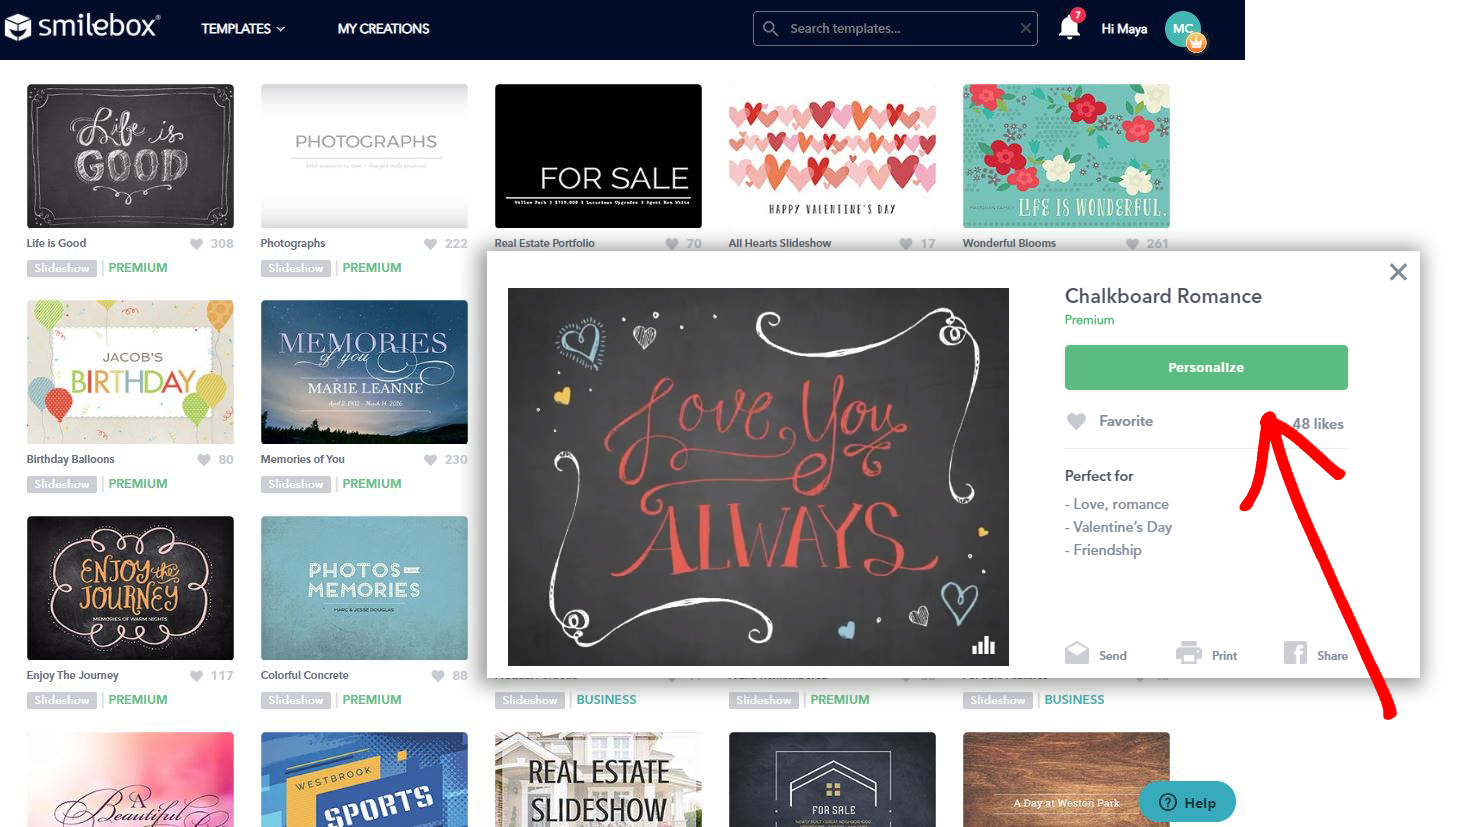
2. Pick a template
Browse hundreds of gorgeous templates for any occasion, from holidays and birthdays to graduations and memorials, and beyond. Once you’ve found a template you love, click Personalize.
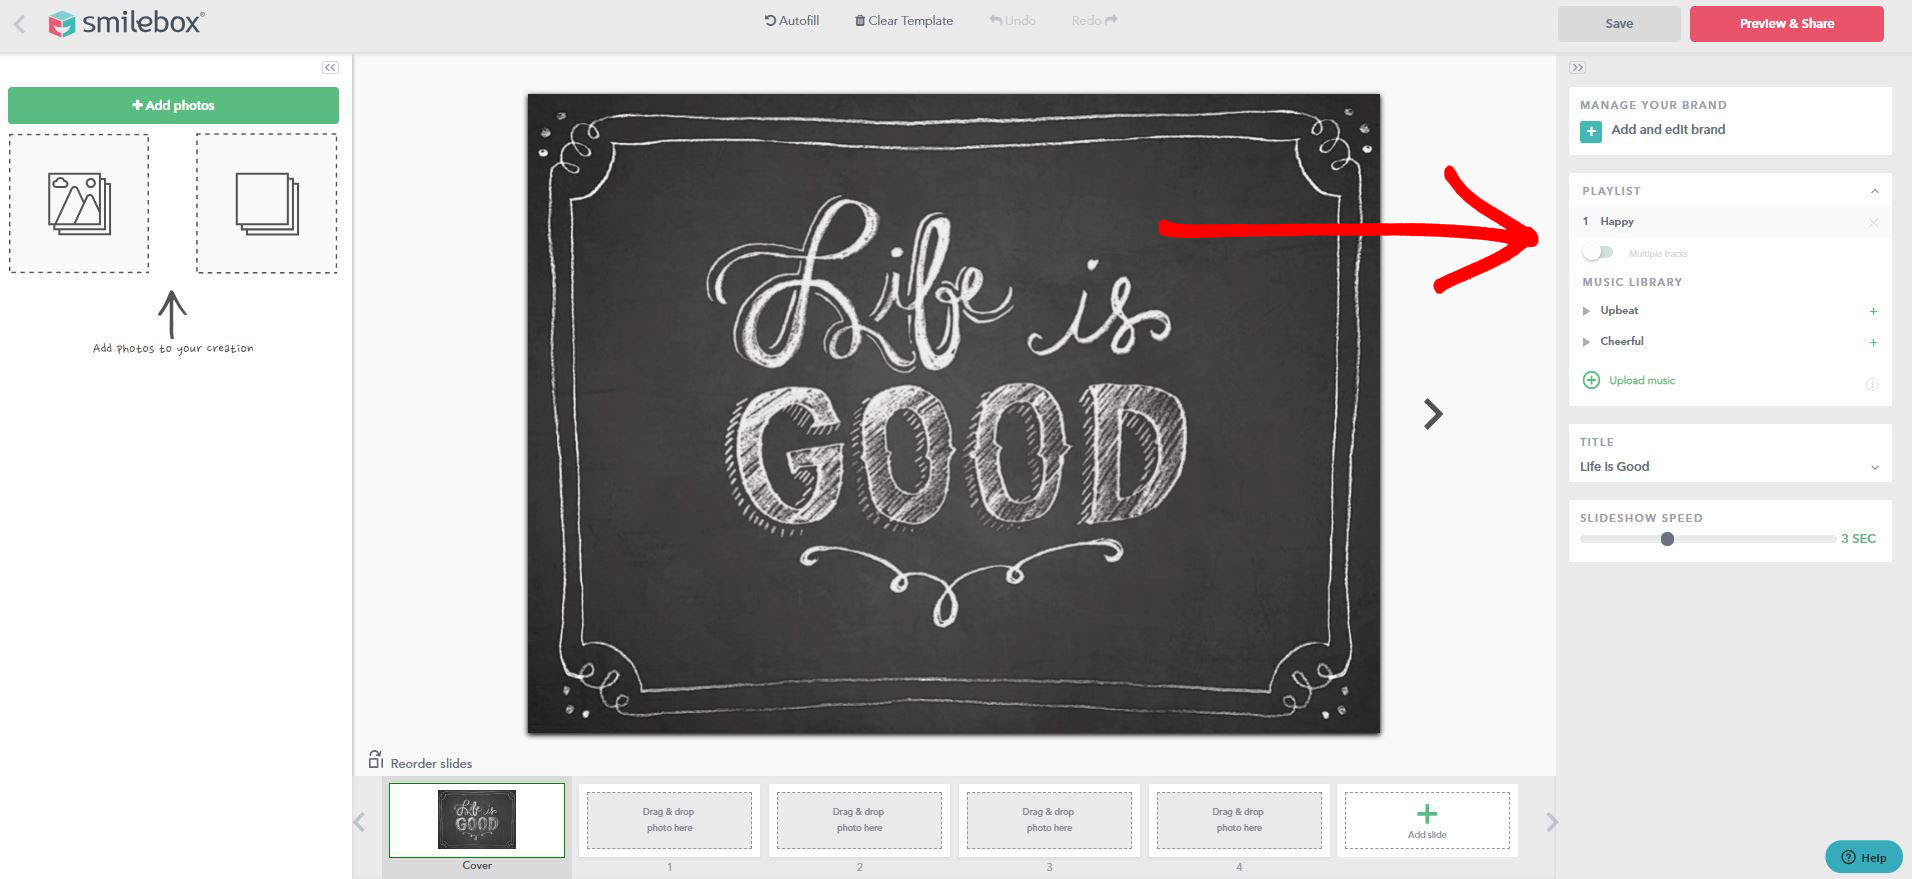
3. Add photos
Upload photos from your computer, phone, Facebook or Instagram; or select existing photos in your Smilebox gallery. You can easily add more photos at any time by clicking Add photos on the top left. Drag and drop your photos where you want them in the template. Play around with the order and layout, such as rotating, flipping, and zooming in. You can also choose cool color effects like sepia or black-and-white.

Customization: How to create a truly personal slideshow for Facebook
4. Choose music
Heighten the emotion in your slideshow with the right song. Browse our music library, or click Upload music to add your own tunes. You can stick with one song in the slideshow you’re creating for Facebook, or mix it up with multiple tracks.
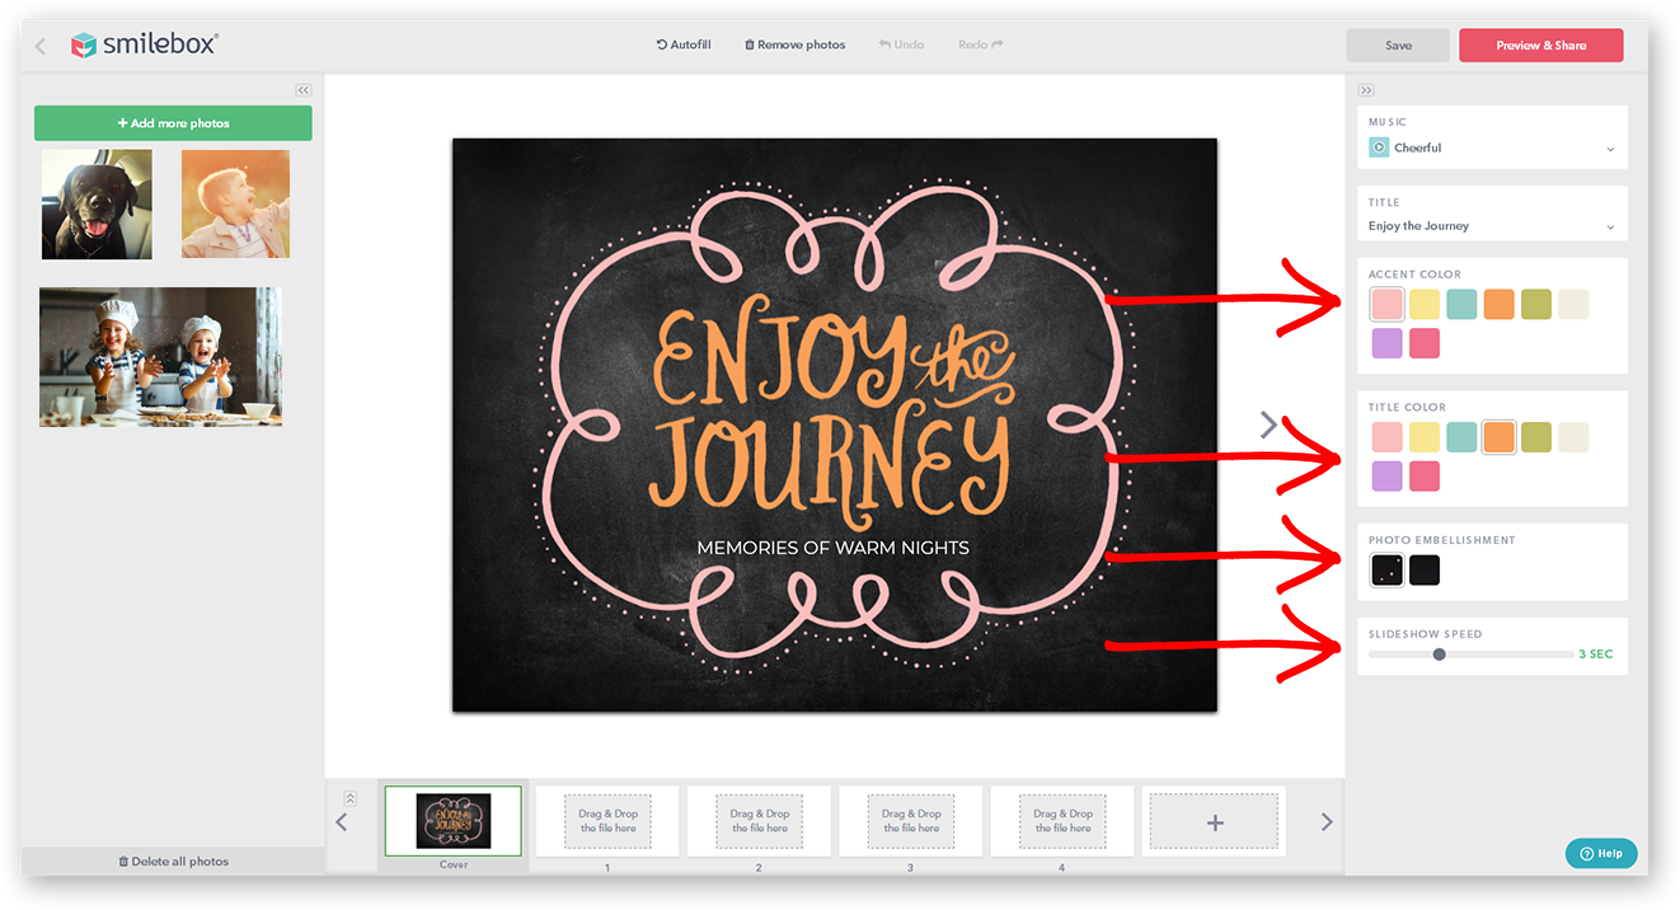
5. Customize text
Create a catchy title for your Facebook slideshow. Double-click wherever it says Add your text here to compose text for the slides, if you wish.

6. Finalize the details
Choose a color scheme for your slideshow’s background. Select photo embellishments, if relevant. Then pick your desired slideshow speed, ranging from 1 second to 7 seconds between slides.
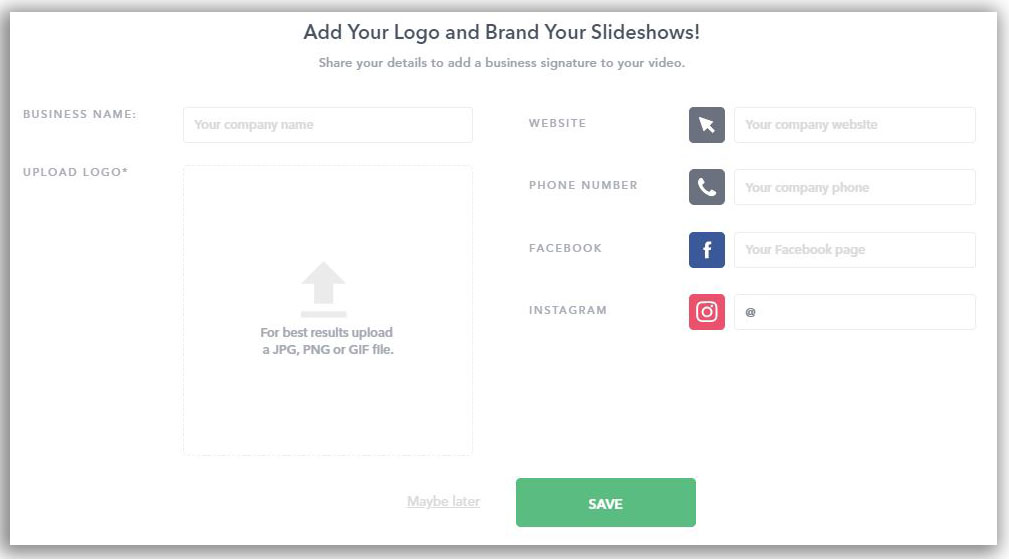
7. Manage your brand (for Business users)
To add a business signature to the end of your slideshow, click Manage Your Brand. There you can add your business name, logo, website, phone, Facebook and Instagram.
After you create a slideshow for Facebook, here’s how to upload and share it
8. Save and preview
Once you’re happy with the slideshow you created for Facebook, click Preview & Share. Then click Continue.
9. Name your creation
Give a descriptive name to the Facebook slideshow you created and click Next. Your creation is now safe and ready to be shared.
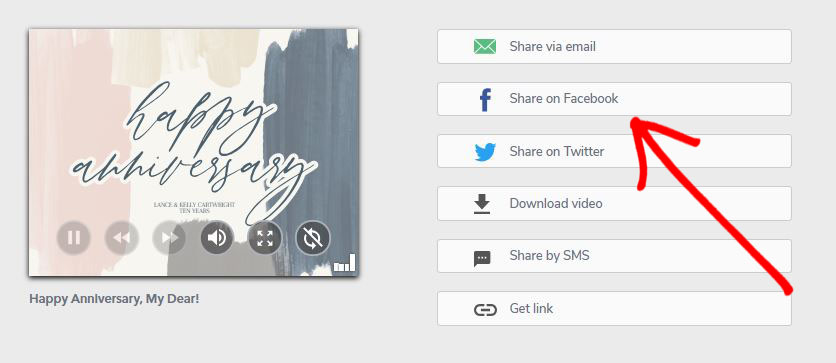
10. Share on Facebook
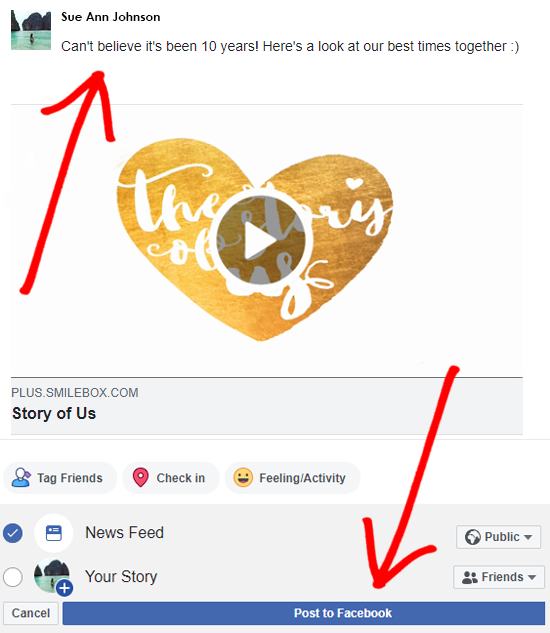
Yay! Your slideshow is ready to be shared—simply click Share on Facebook. You’ll immediately see a pop-up where you can write a status above your post, or just share your creation as it is by clicking Post to Facebook. Other sharing options include sharing on Twitter, email, SMS, downloading the slideshow to your computer, or getting the link.
Tip: Add hashtags to increase engagement, and tag friends, family or colleagues who appear in your slideshow.
And that’s how easy it is to create a slideshow for Facebook!


