

Slideshows are an easy and delightful way to share your photos with friends and family without bogging down their email servers with attachments. If you’d like to share your memories with a simple link, follow these instructions.
- Download Smilebox and open it up to the home screen.
- Click on the orange box that says “Choose your format”
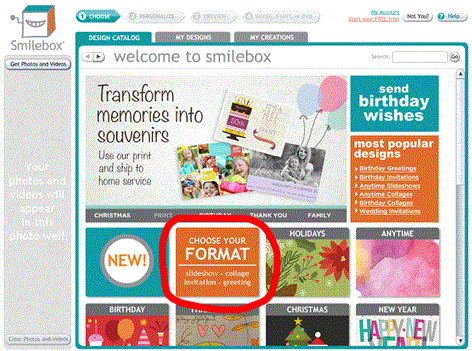
- Choose the first option, Slideshows
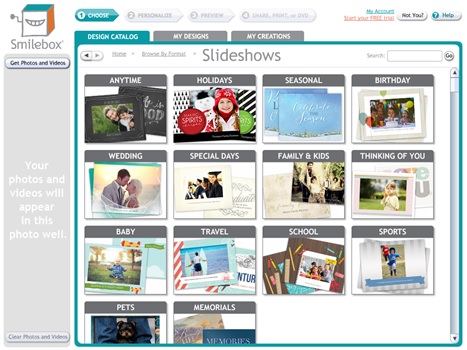
You’ll see the following options: Anytime, Holidays, Seasonal, Birthday, Wedding, Special Days, Family & Kids, Thinking of You, Baby, Travel, School, Sports, Pets, and Memorials. Each category includes multiple designs. For the purpose of this example, I chose Travel, which includes 18 design options.- Select and Personalize Your Design
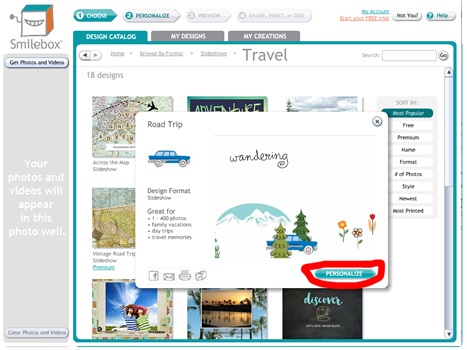
I’ve selected the Road Trip design, which can feature up to 400 photos. I clicked “Personalize” to download the template and to start adding photos to it.- Follow the prompt: “Click here to get photos & videos”
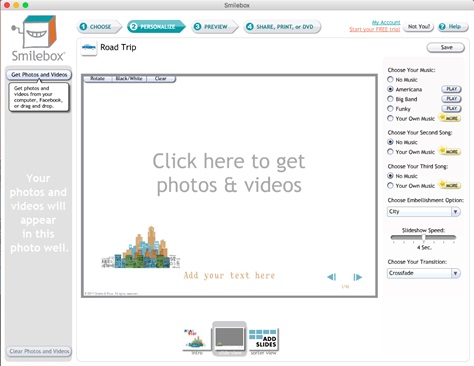
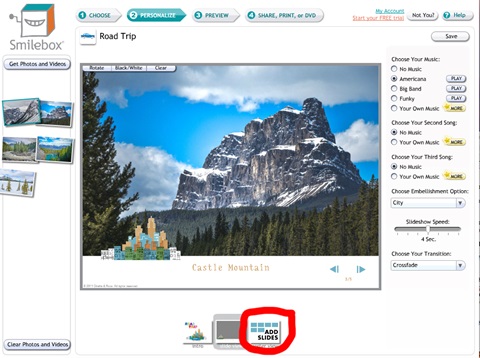
This gives you the option to upload photos from your computer, from Facebook, or from Smilebox for iPhone. I picked “Upload photos from my computer.” After you upload, your photos will be available from the photo well on the left side of the screen. Drag a photo from the well onto the slide in the center of the screen to create the first page of your slideshow.- Choose your music, embellishment, and slideshow speed

Embellishment options include City and Forest. For the Slideshow speed, you can choose between 1 and 8 seconds. The transition has several options as well, including cross fade.- Choose the “Add Slides” option from the bottom of your window to add additional pages to your slideshow
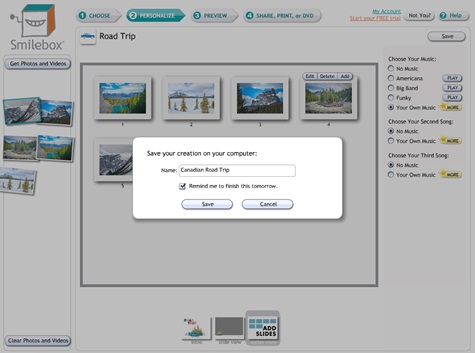
Finish adding your photos and rearrange the slides by clicking and dragging the thumbnails in “Add Slides.”- Click Save and choose a name for your slideshow and then view the preview
9. After the preview, continue on to “Share, Print, or DVD”

I chose “Share Digitally” and then “Email your creation.” I clicked “send,” typed in the email I wanted to send it to (as well as an optional message), and sent my slideshow on its way.10. Choose your account option

I picked “Free” as a way to send my creation. Because I’ve saved my slideshow, I can access it again if I want to share it on Facebook later or email it to more people.
As you can see, it’s fun and easy to turn your memories into a slideshow. And now, you can even transform that same slideshow into a book — in just a few clicks. Enjoy!
- Choose the first option, Slideshows


